With HPE Data Protector you have advance VM recovery functionality when backing up using either a 3Par or Smart Cache device.
To give you some background on why this is the supported method is due to the flow/process that Data Protector uses when doing this type of recovery.
Once the restore job has been created as a Power On or Live Migrate, Data Protector will create a NFS share from the Smart Cache device and present and mount it to the ESXi server, sounds simple enough and it is since Data Protector does all of this for you. The reason your Smart Cache device cannot use NAS mount points is due to limitations of NAS in that you cannot do a double mount on a shared volume. What is a double mount you ask? When you create a NAS share (CIFS or NFS) that counts as one share, as explained above that Data Protector process is to create a NFS share to present to the ESXi server, if attempted on a NAS share that would count as the second share which is the part that is not supported.
By definition a Smart Cache is as follows:
Smart Cache:
The Smart Cache is a backup to disk device that enables non-staged recovery from VMware backups. The Smart Cache device can operate on one of the following mount points:
- NAS share (CIFS and NFS)
- Disk (SAN, iSCSI, local) formatted with file system
However it needs to be noted that in order to do Power on or Live Migrate the Smart Cache device can NOT use NAS share as a mount point, only SAN, iSCSI and Local disk are supported.
To get started select which server will be used as the Smart Cache client with the above mentioned storage type, set your storage up as you normally would a typical file system, create a directory on the file system.
Once that has been done you will need to run the following commands from the Powershell Admin console, this enables the server to run remotely signed executable jobs that Data Protector will run to create a NFS share from the Smart Cache device. The second command just verifies that the server is configured correctly.
Set-ExecutionPolicy remotesigned
You will be prompted to verify are you sure you want to do this, you would type “Y” for yes as in the screen shot below.

Next you will need to run the following command from the c:\Program Files\Omniback\bin directory if you are using windows. As shown in the screen shot below
.\nfsServiceCheck.ps1

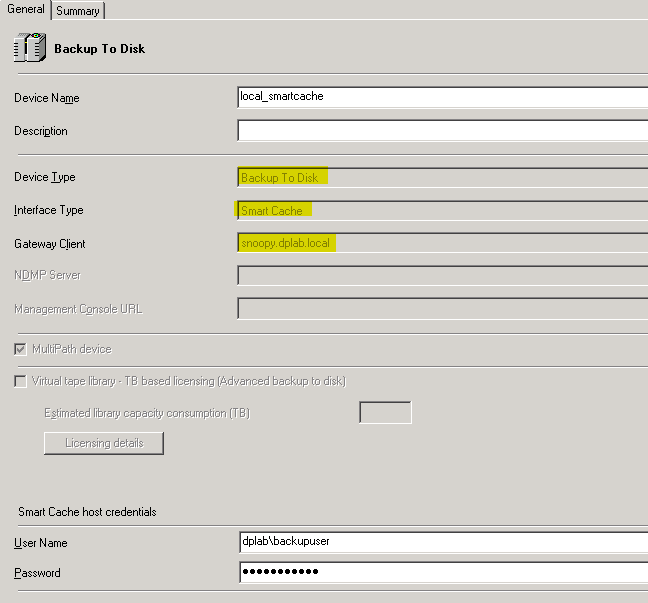
Once this has been done you just simply create a new Backup to Disk device using the client you configured above as seen in the screen shot below

Once you have the device created you simply run your VM integrated backup with this device as your target.
When you are ready to do a Power On or Live Migrate restore you will select the recovery version that used the Smart Cache device and select the Power On or Live Migrate from the VM options drop down as highlighted below.

Then you set the destination from the destination tab and hit the Power On button at the bottom as highlighted in the screen shot below

Then the restore process will begin. Just as a reminder when a Power On is the restore type selected it will power on the restored VM with networking disabled as not to interfere with the already running VM with the same name.
The restore session will look something like the screen shot below

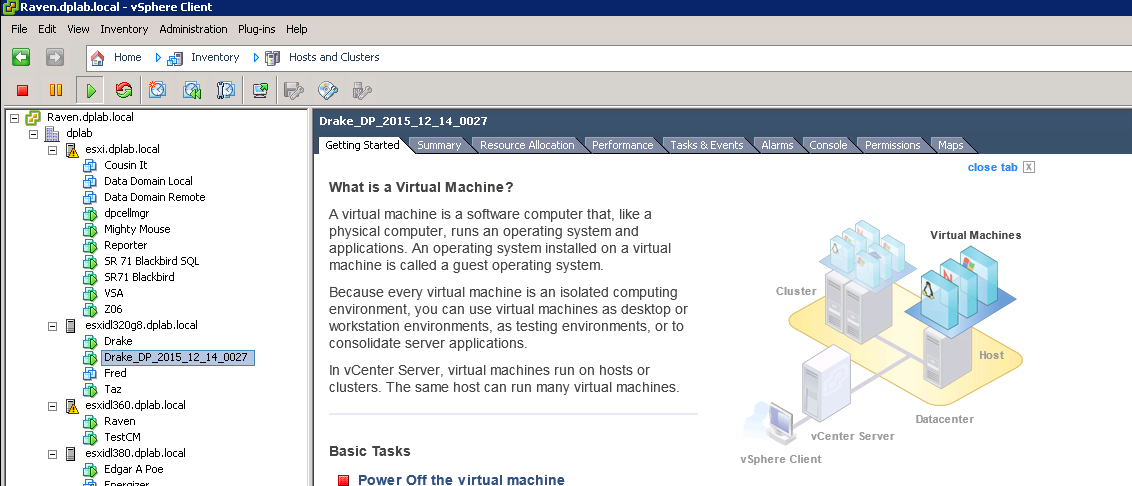
You will note on the vCenter server that it creates a new VM using the session id as part of the name, and again it is powered on with its Networking disabled.

Once you have finished your testing, Twenty-Four hours later Data Protector will automatically delete the mounted VM from the vCenter server (does not apply for live migrated machines).
This post was prepared and documented by Geoff Rennie. Geoff is a Presales colleague in HPE Software – AMS region. Thanks for sharing this content.
Hi Daniel,
thanks for this detailed post.
I tried to build it in my testing Environment some weeks ago, but it wasn’t successful.
When running the nfsServiceCheck.ps1 the outout is true.
But the PowerOn fails:
[Normal] From: RMA-NDMP@backup.localdomain “SmartCache_gw1 [GW 2792:0:6639023636251131323]” Time: 09.03.2016 21:03:27
COMPLETED Media Agent “SmartCache_gw1 [GW 2792:0:6639023636251131323]”
[Major] From: VEPALIB_VMWARE@backup.localdomain “/Datencenter” Time: 09.03.2016 21:03:27
Preparation of replica vm ‘Windows7’ for restore failed …
[Critical] From: VEPALIB_VMWARE@backup.localdomain “/Datencenter” Time: 09.03.2016 21:03:27
Power On Virtual Machine failed.
[Normal] From: RSM@backup.localdomain “” Time: 09.03.2016 21:03:31
OB2BAR application on “backup.localdomain” disconnected.
Any idea?
Environment:
CS: Windows Server 2012 R2 – DP9.05_106
ESXi6U1b with vSpere 6U1b Appliance
Windows vCenter doesn’t solve my issue.
Thank you.
Lars
Hi Lars,
maybe the port is already in use by another application (was the case when I initially tested PowerOn).
Run the “restore” in debug and look for the error to get a first indication.
Best regards
Daniel